Generate Images from Speech with Stable Diffusion & OpenAI Whisper
Share
The Exciting World of AI: Creating Images from Speech
The world of artificial intelligence is evolving at an unprecedented pace! Recent developments in AI technology have opened up remarkable possibilities, particularly in the field of image generation from spoken words. This tutorial will guide you through creating your own application that harnesses these groundbreaking technologies.
Getting Started
Before diving into the coding phase, it’s essential to set up your environment correctly. For the purposes of this tutorial, I will be using Google Colab. If you prefer, you can also run this on your local machine, but ensure you have a GPU for optimal performance.
Installing Dependencies
The first step in creating your AI application is installing the necessary dependencies. A key tool that we will use is FFmpeg, which is vital for recording, converting, and streaming audio and video.
To install FFmpeg and other essential packages, simply execute the following commands in your notebook:
!apt-get install ffmpeg
!pip install necessary-package-name
Note: Should you encounter any issues installing Whisper, check this guide.
Authentication with Hugging Face
Next, we need to authenticate Stable Diffusion with Hugging Face. This step is crucial as it provides us access to various models that we will utilize in this tutorial.
Checking for GPU
Once authentication is complete, it's time to check if we are utilizing a GPU. This is important for speeding up the processing times.
Coding!
Step 1: Speech to Text
To streamline the process, I have recorded my spoken prompt and saved it in the main directory. We will begin by extracting the text from this audio file using OpenAI's Whisper model.
For this extraction, I utilized the code available in the official repository and enhanced it by adding some creative tips at the end of the prompt.
Step 2: Text to Image
Now comes the exciting part—generating an image from the transcribed text. We will use the Stable Diffusion model for this.
from stable_diffusion import StableDiffusion

# Load Stable Diffusion Model
model = StableDiffusion()

# Generate Image
image = model.text_to_image(transcribed_text)
Once the model is loaded, we can use the `pipe` function to generate an image from the text.
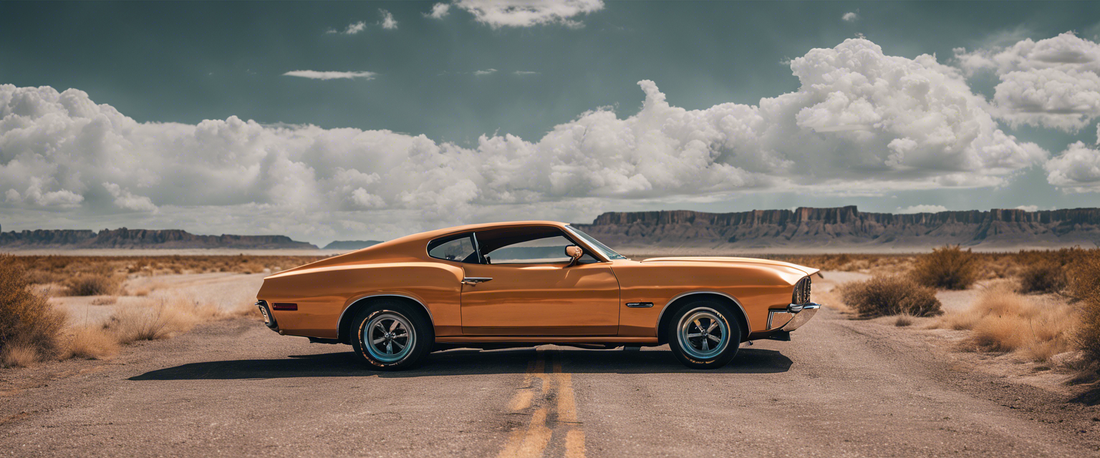
Step 3: Check Results
Let’s take a moment to review the outcome of our image generation:
image.show()
While the result might not be perfect, it demonstrates the exciting reality that we can now generate images with our voice! Consider the advancements made in the last decade compared to what is achievable today!
Conclusion
I hope you enjoyed this journey into the realms of AI and the power of voice-activated image generation. Thank you for participating, and I encourage you to revisit for more innovative tutorials!
Jakub Misio, Junior Data Scientist in New Native.

